
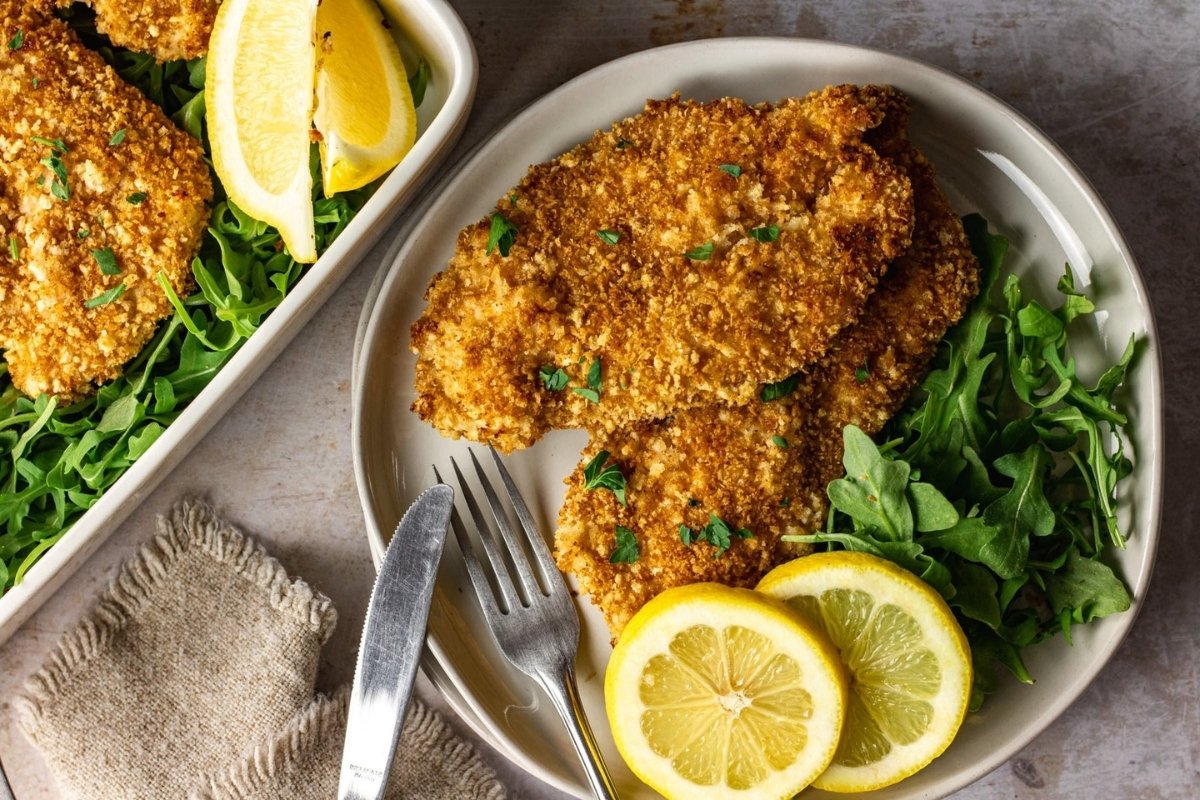
This crispy panko chicken breasts recipe is perfect for a quick and delicious dinner. The panko breadcrumbs give the chicken a delightful crunch, while the garlic powder adds a burst of flavor. It's a simple yet satisfying dish that the whole family will love.
If you don't have panko breadcrumbs in your pantry, you can find them in the baking aisle of most supermarkets. They are lighter and crispier than regular breadcrumbs, which makes them perfect for this recipe. Make sure to also pick up some garlic powder if you don't already have it, as it adds a wonderful depth of flavor to the coating.
Ingredients for Crispy Panko Chicken Breasts
Chicken breasts: Boneless and skinless, these are the main protein component of the dish.
Panko breadcrumbs: These Japanese-style breadcrumbs are lighter and crispier than regular breadcrumbs, providing a perfect crunchy coating.
All-purpose flour: Used to coat the chicken breasts before dipping them in the egg, helping the breadcrumbs adhere better.
Eggs: Beaten to create a sticky surface for the breadcrumbs to cling to.
Salt: Enhances the overall flavor of the chicken.
Black pepper: Adds a bit of heat and depth to the seasoning.
Garlic powder: Infuses the coating with a savory, aromatic flavor.
Technique Tip for This Recipe
To ensure your chicken breasts come out extra crispy, try toasting the panko breadcrumbs in a dry skillet over medium heat for a few minutes until they turn golden brown before using them in the breading process. This step adds an extra layer of crunch and enhances the flavor of the final dish.
Suggested Side Dishes
Alternative Ingredients
boneless, skinless chicken breasts - Substitute with boneless, skinless turkey breasts: Turkey breasts have a similar texture and can be used as a leaner alternative to chicken.
panko breadcrumbs - Substitute with crushed cornflakes: Crushed cornflakes provide a similar crispy texture and can be a gluten-free option if needed.
all-purpose flour - Substitute with almond flour: Almond flour can be used for a gluten-free option and adds a slightly nutty flavor.
beaten eggs - Substitute with buttermilk: Buttermilk can help the breadcrumbs adhere to the chicken and adds a tangy flavor.
salt - Substitute with soy sauce: Soy sauce can add a salty and umami flavor, but use sparingly to avoid overpowering the dish.
black pepper - Substitute with white pepper: White pepper has a similar heat but a slightly different flavor profile, often used in lighter-colored dishes.
garlic powder - Substitute with onion powder: Onion powder provides a similar depth of flavor and can be used if garlic powder is unavailable.
Alternative Recipes Similar to This Dish
How to Store or Freeze This Dish
Allow the chicken breasts to cool completely after baking. This prevents condensation, which can make the coating soggy.
Store the cooled chicken breasts in an airtight container. If stacking, place a piece of parchment paper between each piece to maintain the crispiness.
Refrigerate the container with the chicken breasts for up to 3-4 days. This ensures the chicken remains fresh and safe to eat.
For freezing, wrap each chicken breast individually in plastic wrap or aluminum foil. This helps to prevent freezer burn and keeps the chicken tasting fresh.
Place the wrapped chicken breasts in a freezer-safe bag or container. Label with the date to keep track of storage time.
Freeze the chicken breasts for up to 2 months. Beyond this period, the quality may start to decline.
To reheat, preheat your oven to 375°F (190°C). Place the frozen chicken breasts on a baking sheet and bake for 20-25 minutes, or until heated through and crispy.
Alternatively, for a quicker option, use a microwave. Place the chicken breast on a microwave-safe plate and cover with a damp paper towel. Microwave on high for 2-3 minutes, checking halfway through to ensure even heating.
For best results, avoid reheating the chicken breasts in a skillet or frying pan, as this can make the coating greasy and less crispy.
How to Reheat Leftovers
Preheat your oven to 350°F (175°C). Place the leftover chicken breasts on a baking sheet lined with parchment paper. Cover them loosely with aluminum foil to prevent the panko coating from getting too dark. Bake for about 15-20 minutes, or until the chicken is heated through and the coating is crispy.
For a quicker method, use a toaster oven. Set it to 350°F (175°C) and place the chicken breasts on the rack. Heat for about 10-15 minutes, checking halfway through to ensure they don't overcook.
If you prefer using a skillet, heat a small amount of olive oil over medium heat. Place the chicken breasts in the skillet and cook for about 3-4 minutes on each side, or until they are heated through and the coating is crispy.
For an air fryer, preheat it to 350°F (175°C). Place the chicken breasts in the basket in a single layer. Heat for about 5-7 minutes, shaking the basket halfway through to ensure even reheating.
If you're in a hurry, the microwave can be used, though it may not keep the panko coating as crispy. Place the chicken breasts on a microwave-safe plate and cover with a damp paper towel. Heat on medium power for 1-2 minutes, checking halfway through to avoid overcooking.
Essential Tools for This Recipe
Oven: Used to bake the chicken breasts at a consistent temperature of 400°F (200°C).
Baking sheet: Provides a flat surface to place the coated chicken breasts for baking.
Three bowls: Used to set up the breading station; one for flour, one for beaten eggs, and one for the panko breadcrumb mixture.
Whisk: Used to beat the eggs until they are well combined.
Measuring cups: Used to measure out the flour, panko breadcrumbs, and other ingredients accurately.
Measuring spoons: Used to measure out the salt, black pepper, and garlic powder.
Tongs: Useful for handling the chicken breasts while coating them in flour, eggs, and panko breadcrumbs.
Cooling rack: Optional, but can be used to let the chicken rest after baking to maintain its crispiness.
Parchment paper: Optional, but can be used to line the baking sheet for easier cleanup and to prevent sticking.
Knife: Used to trim any excess fat or unwanted parts from the chicken breasts before coating.
Cutting board: Provides a safe surface to prepare the chicken breasts.
Time-Saving Tips for This Recipe
Prepare ingredients ahead: Measure and mix panko breadcrumbs, flour, and seasonings in advance to streamline the process.
Use a baking rack: Place the chicken breasts on a baking rack over the baking sheet for even cooking and easy cleanup.
Double the recipe: Make extra crispy chicken breasts and freeze them for a quick meal later.
Preheat the oven: Start preheating your oven before you begin prepping to save time.
Line the baking sheet: Use parchment paper or a silicone mat to reduce cleanup time.
Crispy Panko Chicken Breasts
Ingredients
Main Ingredients
- 4 pieces Chicken breasts boneless, skinless
- 1 cup Panko breadcrumbs
- ½ cup All-purpose flour
- 2 pieces Eggs beaten
- 1 teaspoon Salt
- ½ teaspoon Black pepper
- 1 teaspoon Garlic powder
Instructions
- Preheat your oven to 400°F (200°C).
- Set up a breading station with three bowls: one with flour, one with beaten eggs, and one with panko breadcrumbs mixed with salt, pepper, and garlic powder.
- Coat each chicken breast in flour, then dip in the beaten eggs, and finally coat with the panko mixture.
- Place the coated chicken breasts on a baking sheet.
- Bake for 20 minutes or until the chicken is cooked through and the coating is golden brown and crispy.
Nutritional Value
Keywords
Suggested Appetizers and Desserts
More Amazing Recipes to Try 🙂
- Salami Sandwich Recipe5 Minutes
- Chewy Chocolate Chip Oatmeal Cookies Recipe25 Minutes
- Blueberry Pie Recipe1 Hours 30 Minutes
- Amish Slaw Recipe15 Minutes
- Peanut Butter and Pumpkin Dog Treats Recipe40 Minutes
- Strawberry Cake Recipe50 Minutes
- Sinigang na Isda sa Miso Recipe45 Minutes
- Escarole and Beans Recipe30 Minutes
Leave a Reply